
Website security is a must for any blog and a step that you really don’t want to skip.
Yes, I know. Setting up a blog isn’t about the behind the scenes stuff, is it? Isn’t it about writing great content and sharing it with the world?
Well, yes, it is about that. But ignoring the behind the scenes things, such as your blog’s security, and you risk getting hacked and having your website down for a few minutes, or completely losing your entire blog and hackers being able to access all of your information tied to that blog…or any other example of what hackers and bots can do if they find a weakness in your blog.
And don’t rely on thinking that hackers and bots only target massive websites either. Security threats are well-known to target small websites and blog as well.
Some people just love to cause carnage for other people.
So, I’ll repeat again: website security is a must for any blog and a step that you really don’t want to skip.
Because skipping installing a security plugin is like going out to the shops and leaving your front door wide open. Anyone can see what you’ve got inside and anyone can steal it.
And that’s what hackers do. Be them real people or bots, security threats trawl the internet looking for weaknesses in code and attack websites. This could result in something as simple (but irritating) as changing your password, to something much bigger that includes stealing all of your website’s data and rendering your site useless.
In this post, I’ll walk you through how to protect your website in just 10 minutes.
How Do I Set Up My Website’s Security?
I’m glad you asked!
To set yourself up your blog’s security the right way, I suggest using the free version of Wordfence.
Wordfence is a great choice of plugin for your blog’s security because:
- It blocks attacks so your website is kept safe
- It provides you with an industry-leading firewall
- Provides brute force protection
- Enables login security
- Provides plugin and theme vulnerability monitoring
Basically, it’s doing a tonne of legwork to keep your website safe whilst you’re doing the fun stuff, such as creating and promoting your content.
And the best part, is that it can do all of this for you, for free.
In this tutorial, I give you a full break down of step-by-step instructions for installing this plugin, but for the purpose of this article, I strongly suggest downloading and activating Wordfence Security.
Installing and Activating Wordfence
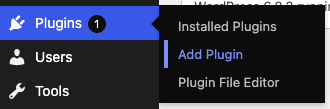
As with when you install most new plugins, hover over the ‘Plugins’ button in your left-hand menu in your WordPress Dashboard and click ‘Add Plugin.’
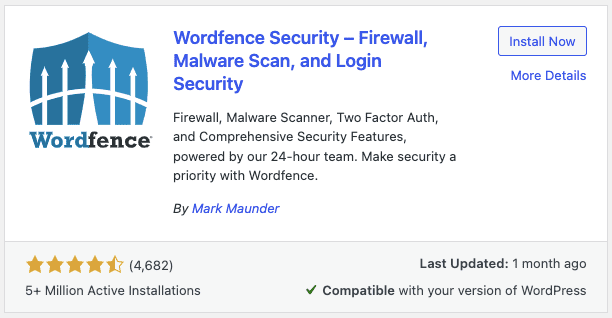
Type ‘Wordfence’ into the ‘Search Plugins’ search bar.

The following plugin will appear in the search results.
There are other plugins that Wordfence has in it’s portfolio, but this is the one that you want.
Click ‘Install Now.’
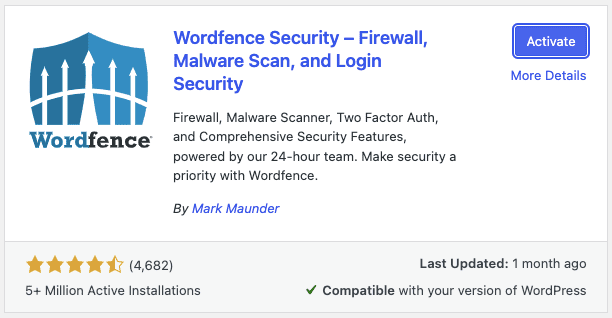
When prompted, click ‘Activate.’
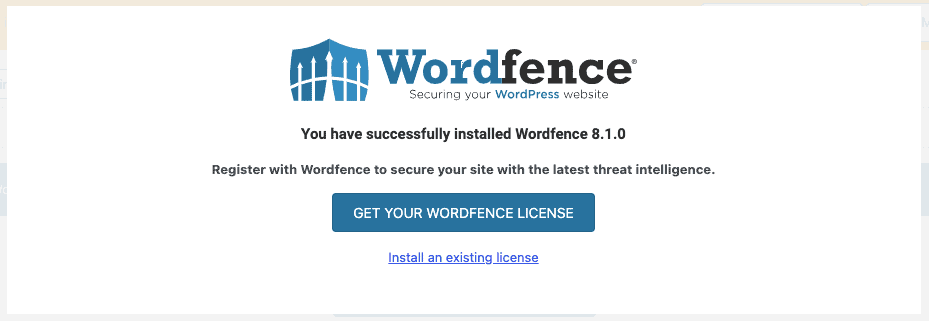
The following screen will appear.
Click ‘Get Your Wordfence License.’
You’ll be taken to the Wordfence website where you can see all of the Wordfence plans.
Click ‘Get a Free License.’
You’re welcome to purchase Wordfence Premium, Care, or Response if you’d like, but for the purpose of this tutorial, we’re focusing on Wordfence Free.
I’ve been using Wordfence Free for years and across multiple blogs and I’ve never felt the need to upgrade. So whilst you’re welcome to part ways with your cash, at this stage of your blog, I’m of the opinion that you’ll probably be fine with the free version of Wordfence.

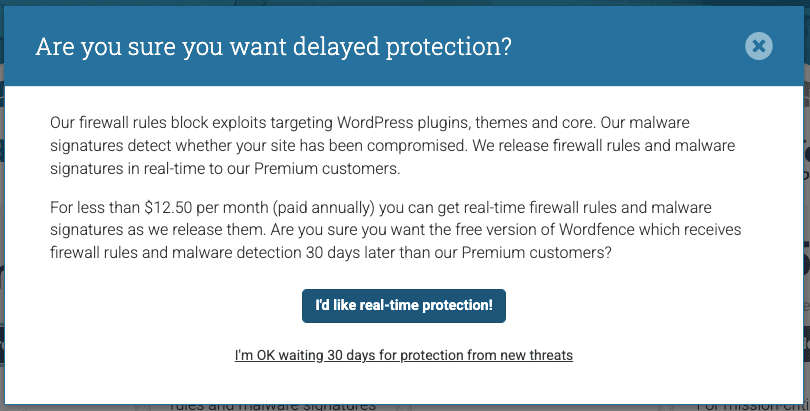
As you’ve clicked ‘Get a Free License,’ Wordfence will invariably try and upsell you on your website’s protection.
If you’re happy to proceed with the free license, when this screen appears, click ‘I’m OK waiting 30 days for protection from new threats.’
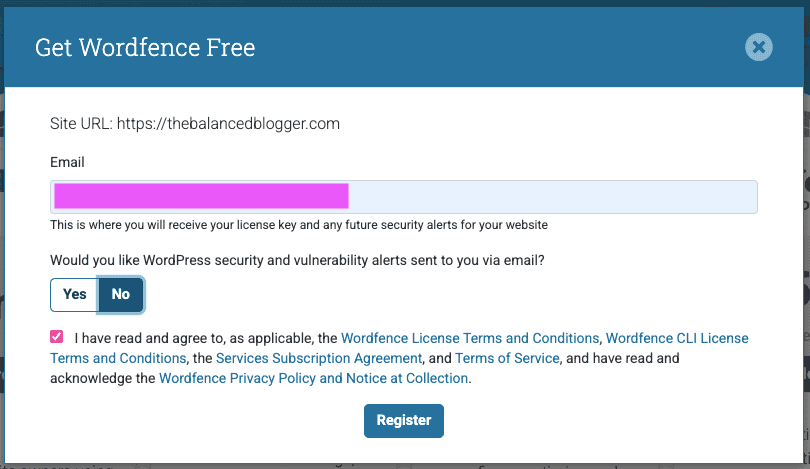
When prompted, type your email address into the following screen.
Then select ‘Yes’ and ‘No’ depending on whether you’d like notification emails from Wordfence about WordPress security and vulnerability alerts sent to you via email.
Check the box that says that you have read and agree to the Terms and Conditions.
Click ‘Register.’
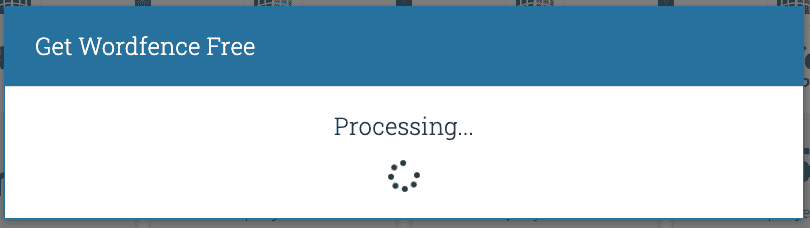
Give it a couple of seconds to process…
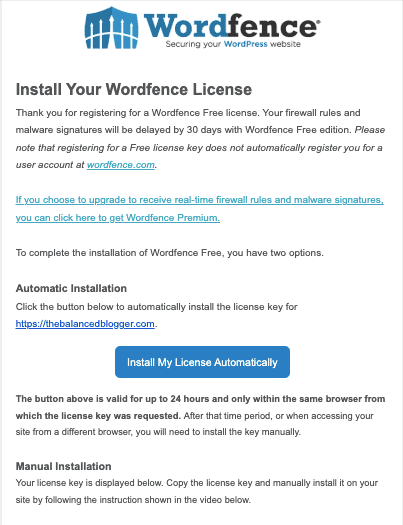
And then, when prompted, go to your Inbox for the email address you have just given Wordfence.
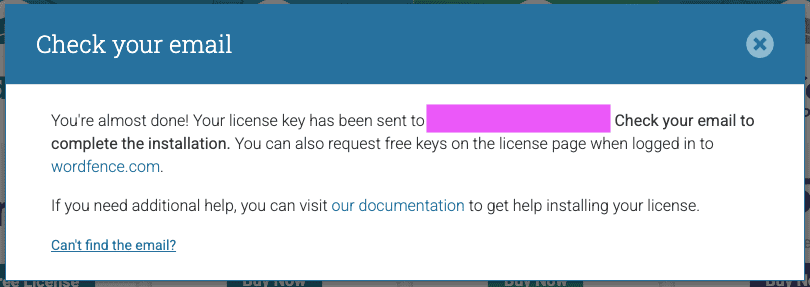
You should have the following email (or very similar) appear in your Inbox.
If there isn’t anything in your Inbox, check your Junk or Spam boxes.
On the email, click ‘Install My License Automatically.’
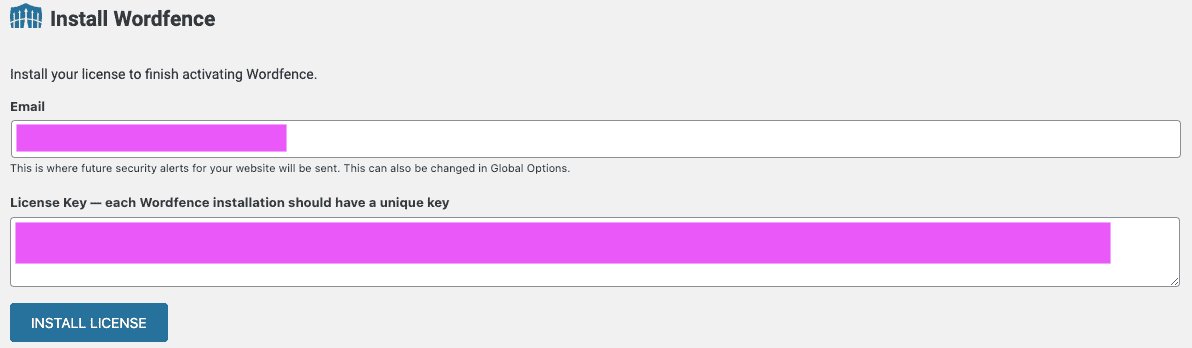
You’ll be taken back to WordPress where you’ll see your email address and a license key already populated into the box that appears.
Click ‘Install License.’
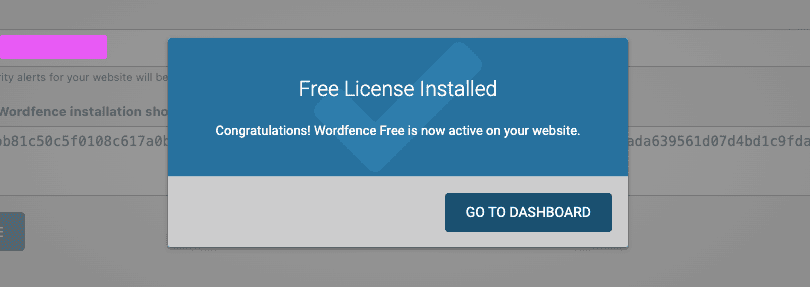
After a couple of seconds, the following box will appear, notifying you that your free Wordfence license has been installed.
Click ‘Go to Dashboard.’
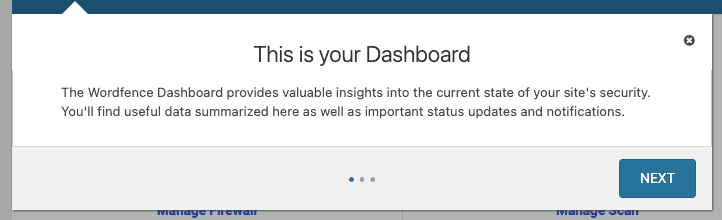
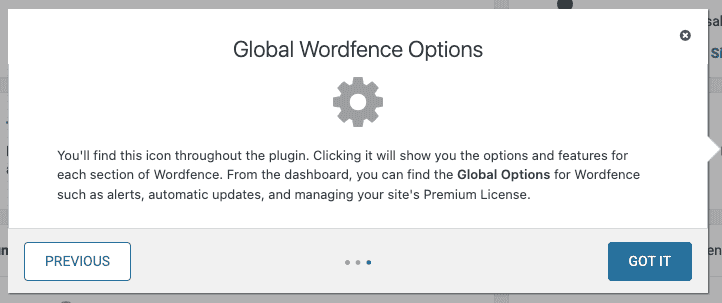
The Wordfence plugin will then walk you through 3 screens. This is to help you familiarise you with the Wordfence Plugin Dashboard within WordPress.
Read the information and click ‘Next.’
Read the next pop-up box and click ‘Next.’

Read the final pop-up box and click ‘Got It.’
And you’re all set!
The Wordfence plugin and free license are now installed and activated for your WordPress blog.
But before you go off to write another blog post or set up another part of your website, I recommend going through a couple more steps to ensure that Wordfence is fully optimised for your site.
Enabling Auto-Update
On the Dashboard, you’ll likely notice the following warning asking whether or not you want to up-date Wordfence automatically.
Click ‘Yes, enable auto-update.’
This will mean that whenever there is an update with the Wordfence plugin, WordPress will automatically update it for you without you needing to manually go in and update the plugin. Auto-update is strongly recommended to ensure that your website’s security remains at its highest level.

Configuring the Wordfence Firewall
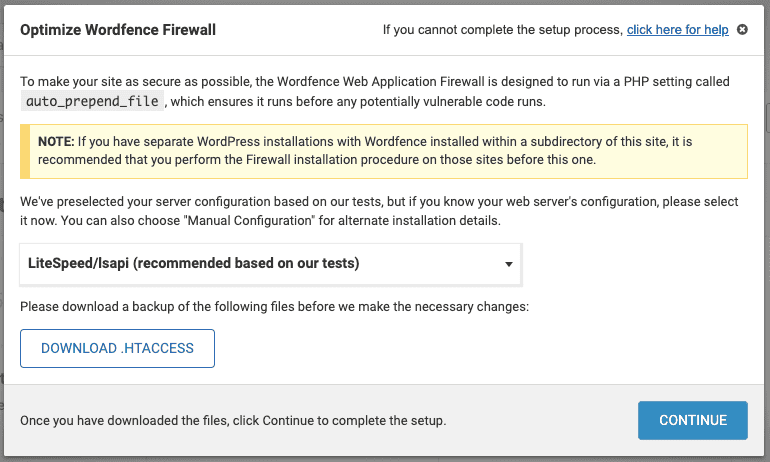
After you’ve enabled auto-update, you’ll see another warning notice asking you to configure the Wordfence Firewall.
Click ‘Click Here to Configure.’

The following screen will appear.
Click ‘Download .HTACCESS’ and wait for the file to download. You’ll likely not need it, but this is just a precaution in case something goes wrong during the optimisation process.
Once the file is downloaded, click ‘Continue.’
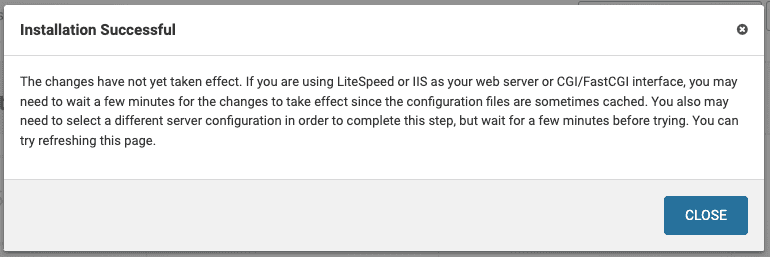
After a few seconds, the following message should appear stating that the installation was successful.
Click ‘Close.’
You can now delete the HTACCESS file that you’d previously downloaded, as you don’t need it anymore.
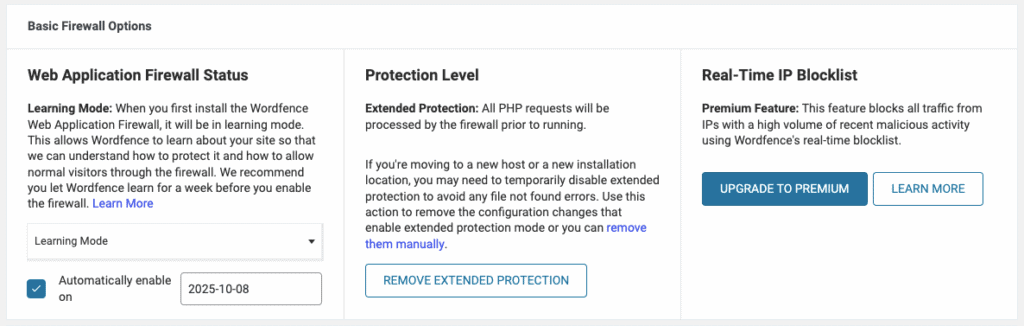
After you’ve clicked ‘Close,’ you’ll see the Firewall Options.
You’ll see that the Brute Force Protection is now working. The other three sections will be in ‘Learning Mode.’ This is because Wordfence is trawling your site to understand how it works and quietly sets itself up in the background. Wordfence will continue to learn about your website for around a week.
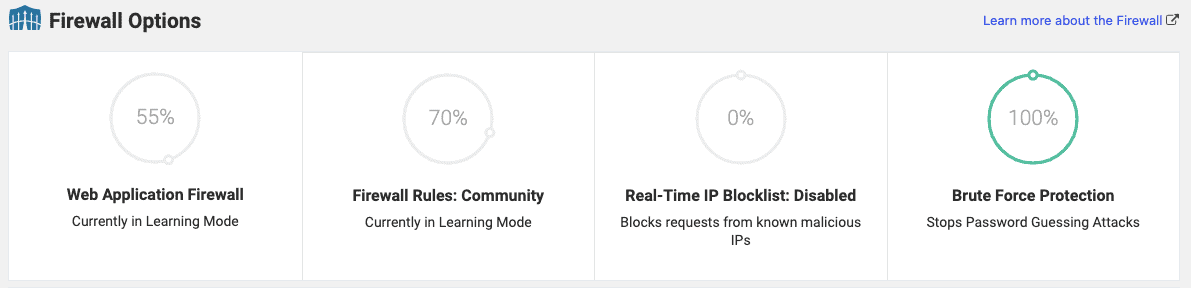
Underneath this, you’ll see ‘Basic Firewall Options.’ You’ll see that Learning Mode is highlighted in the drop down menu and that after a week, Wordfence will automatically change this to ‘Enable and Protecting.’
As long as ‘Automatically enable on’ is checked and there is a date for a week’s time, you don’t need to do anything else.
If it is unchecked, check the box and enter a date for next week.
Purging Your Website’s Cache
Finally, as with when you’ve installed, activated, deactivated, or uninstalled any plugin, make sure that you purge all of your cache as this will ensure that your blog continues to run smoothly.
If you are using LiteSpeed Cache, hover over the plugin’s symbol at the top of your Dashboard and then click ‘Purge All.’

And that’s it, you’re all done!
You can now set up another element of your blog or get cracking on with writing your next blog post.